Using Decrediton
Last updated for Decrediton v1.6.3.
This guide assumes you have already set up a Decrediton wallet using the Decrediton Setup guide.
Main menu
The main menu of Decrediton is displayed on the left side of the window, and it is used to switch between the different features Decrediton offers. It can be minimized by clicking the arrow icon at the top. At the bottom of the menu is a button to rescan the blockchain. This button will force a rescan of all of your owned addresses to check for new transactions, which can sometimes fix issues where Decrediton is displaying an incorrect balance. This process will take some time, however it will not cause Decrediton to redownload the whole blockchain.
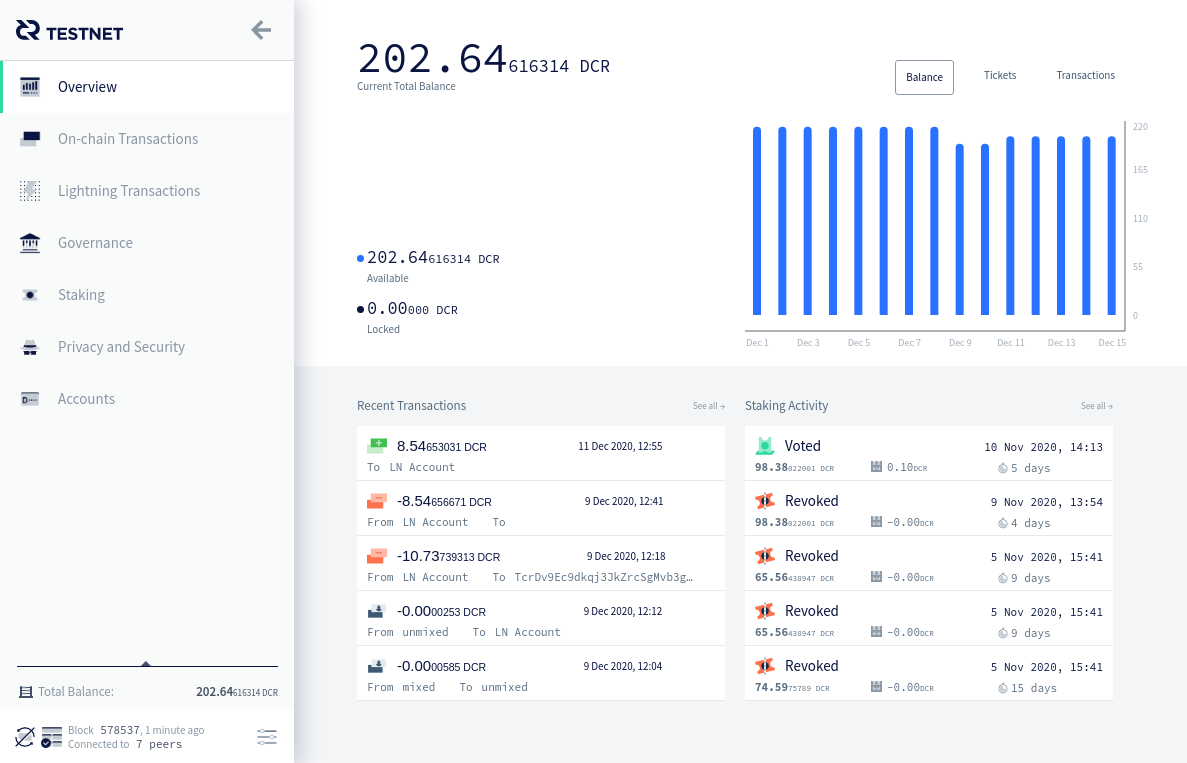
Overview
The overview tab gives a quick summary of your total DCR (available and locked in tickets) and a list of recent transactions.
Graphs of your balance, ticket activity and transaction history over the last two weeks can be viewed here.
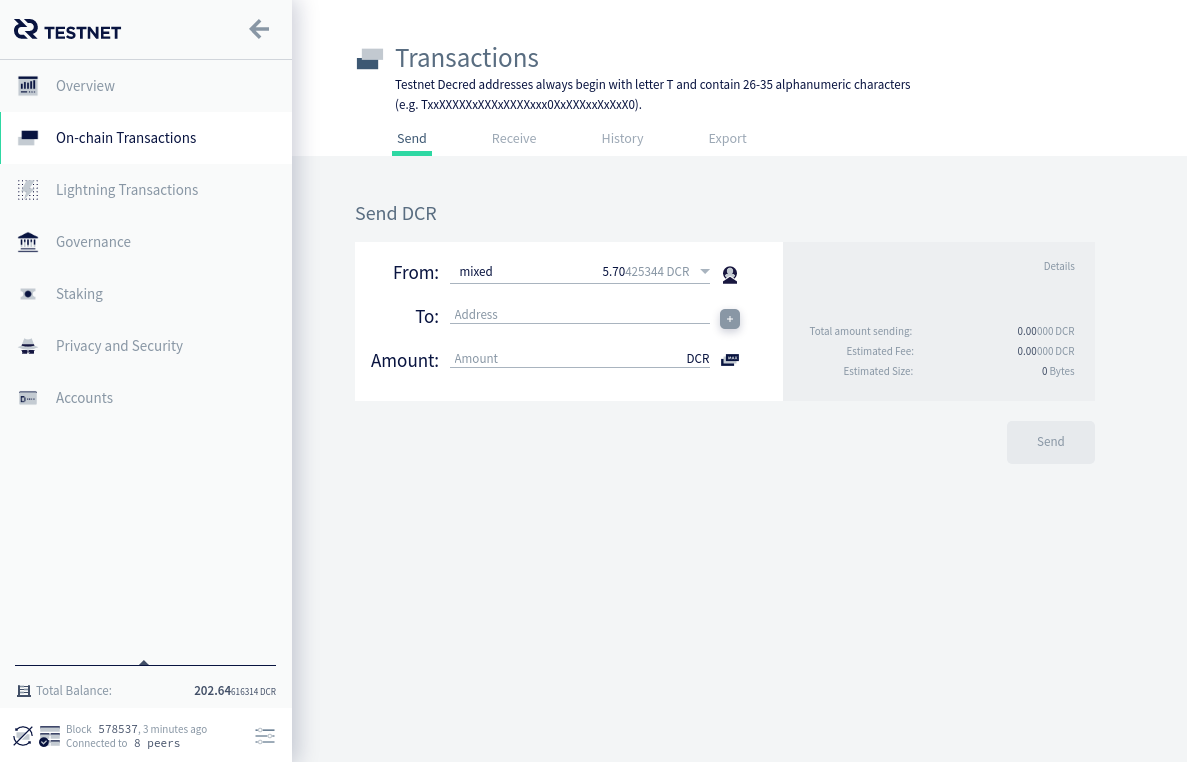
On-chain Transactions
The on-chain transactions tab is split into four sections:
Send
This where you can send Decred from your wallet to another address. First you need to select which account in your wallet to send the funds from, and then enter the recipient address into the text box. Finally enter the amount of Decred you wish to send.
There are additional buttons here which can be used to create more advanced transactions if required. The + button will allow you to send Decred to multiple addresses in a single transaction. The Send All button will construct a transaction that will completely drain the selected account. There is also a button which will allow you to send funds from one account in your wallet to another account in your wallet.
Once you have entered the details of your transaction, the estimated fee and transaction size are detailed below the input panels. After reviewing these numbers, you can press the Send button and your transaction will be broadcast.
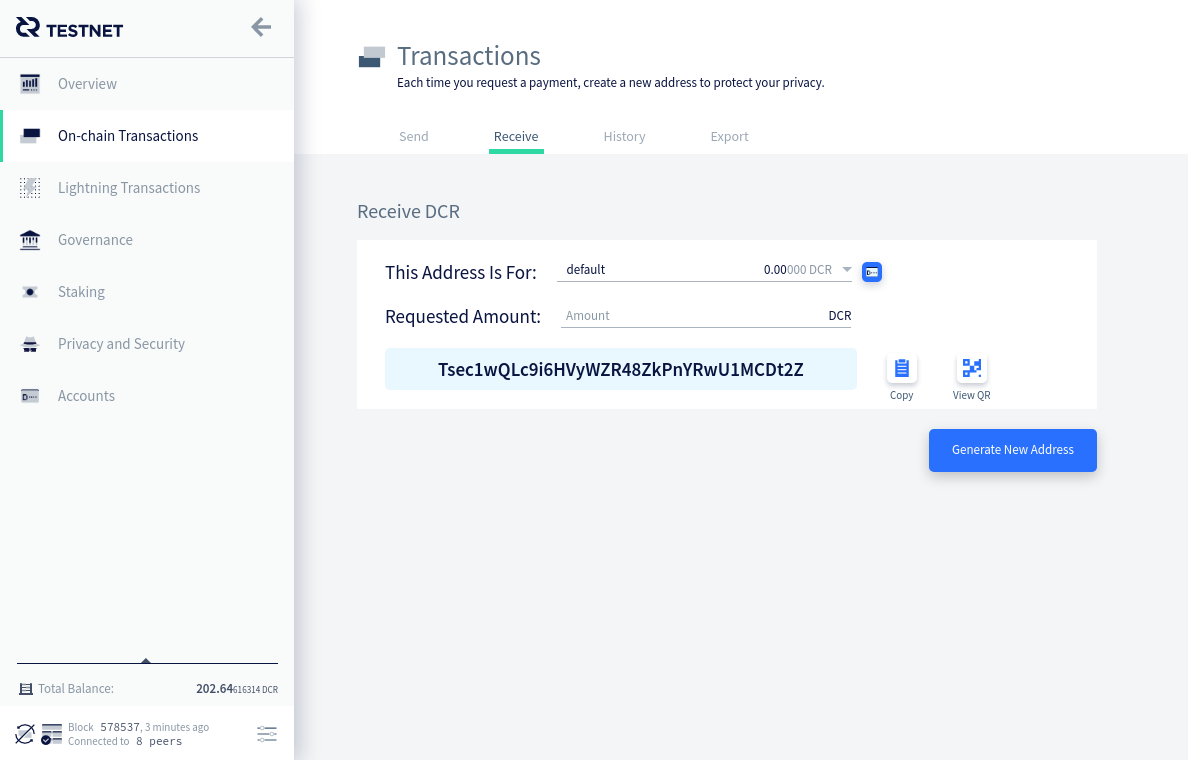
Receive
This is where you can generate wallet addresses to give to other people so they can send you DCR. The address is displayed in the blue text box - it’s the line that starts with Ds, or Ts on testnet. Simply choose the account you want funds to go to and select the Generate New Address button. Decred addresses can be used as many times as you want, but for privacy reasons it’s best to generate a new one for each transaction. There’s around 1.4E48 (that’s 14 followed by 47 zeroes) addresses available so you don’t need to worry about running out.
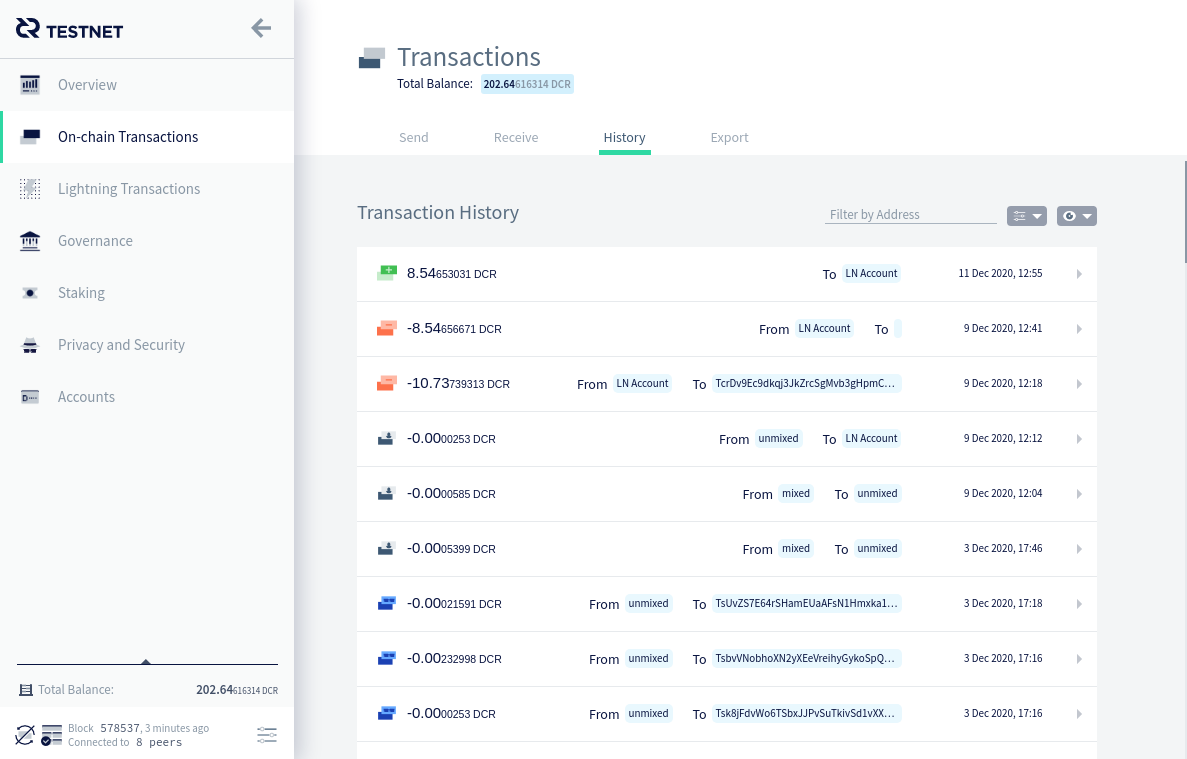
History
This tab shows a list of all transactions that have occurred involving this wallet. A dropdown menu allows filtering the list by transaction type: regular, ticket and vote transactions. The transaction hash can be used with the block explorer to see more information about the transaction.
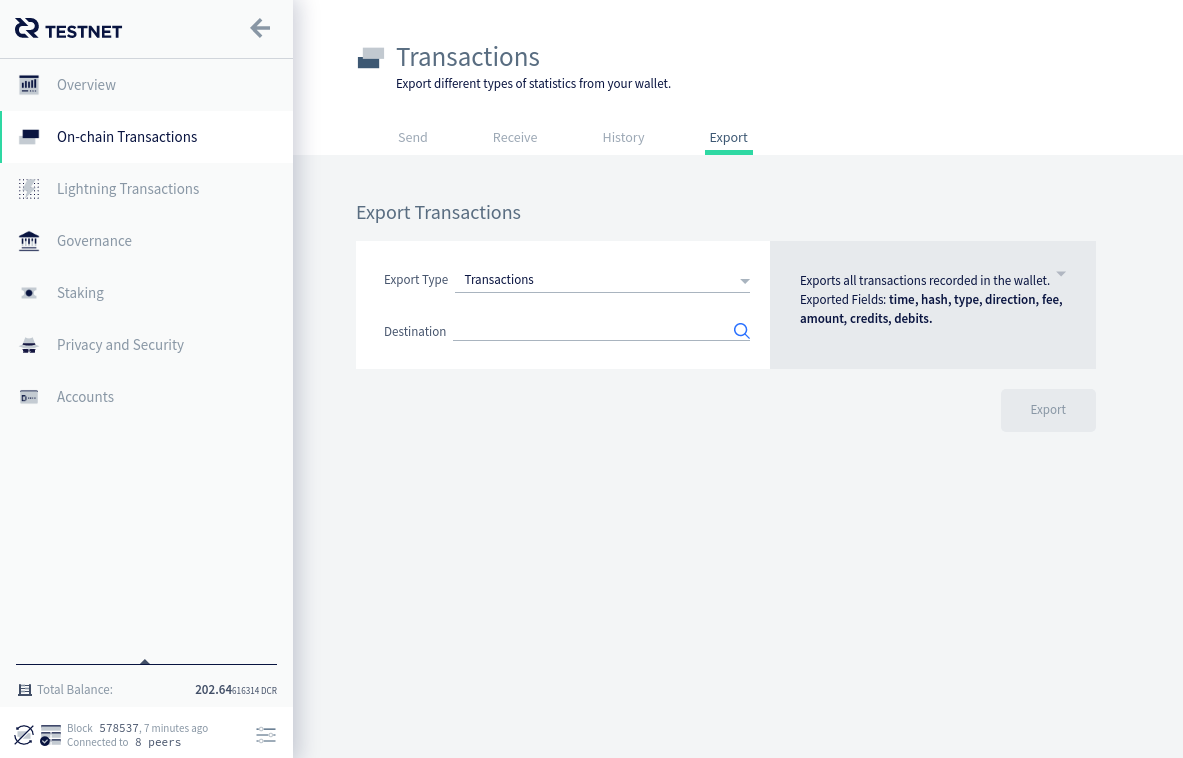
Export
This tab shows allows you to export your transaction history in a .csv format. You can choose the data you wish to export, select a location to output the generated file, and then press the Export button.
Governance
The governance tab enables users holding tickets to have their say on Decred’s governance. Here you can browse and vote upon Politeia proposals, and you can set your voting preferences for on chain consensus rule votes. Your privacy settings must allow Decrediton to contact Politeia to download proposal information.
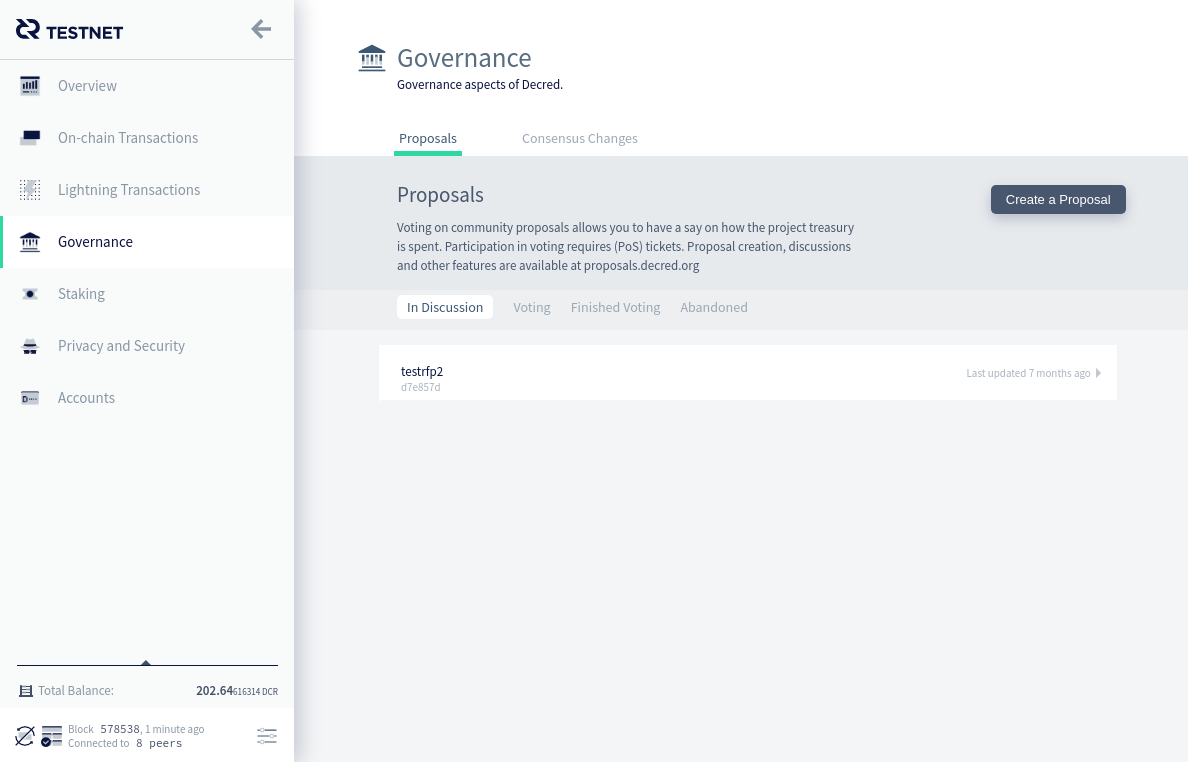
Politeia proposals can be filtered by “Under Discussion”, “Under Vote”, “Finished Voting” and “Abandoned”. The “Create Proposal” button will open https://proposals.decred.org in your browser.
You are able to vote on proposals if the following two criteria are met:
-
There are currently proposals available open for voting
-
You owned live proof-of-stake tickets when the proposal was opened for voting
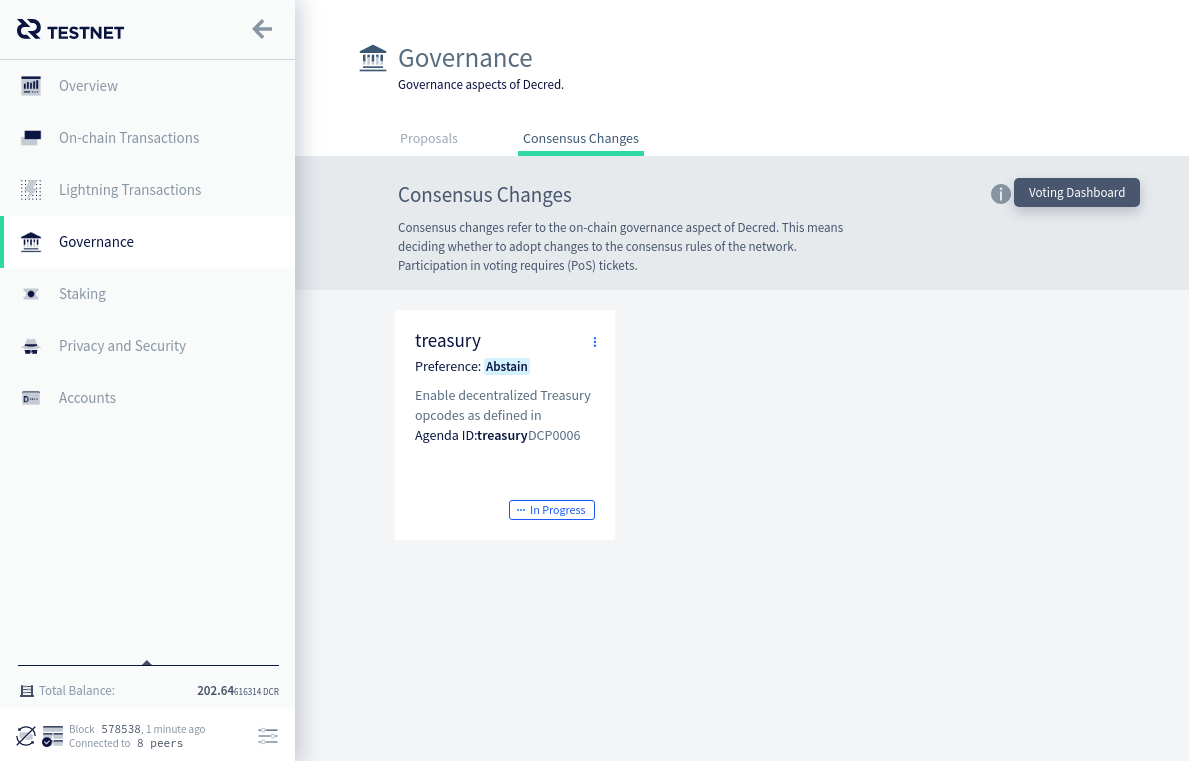
The Consensus Changes page shows all of the agendas which are currently up for vote on the Decred blockchain. You can read the details of each agenda and choose which way you would like to vote on each issue. This setting is only used at the moment each individual ticket votes, which means that you can change your voting preferences if you change your mind about an agenda.
Staking
The staking tab is split into four sections:
Purchase Tickets
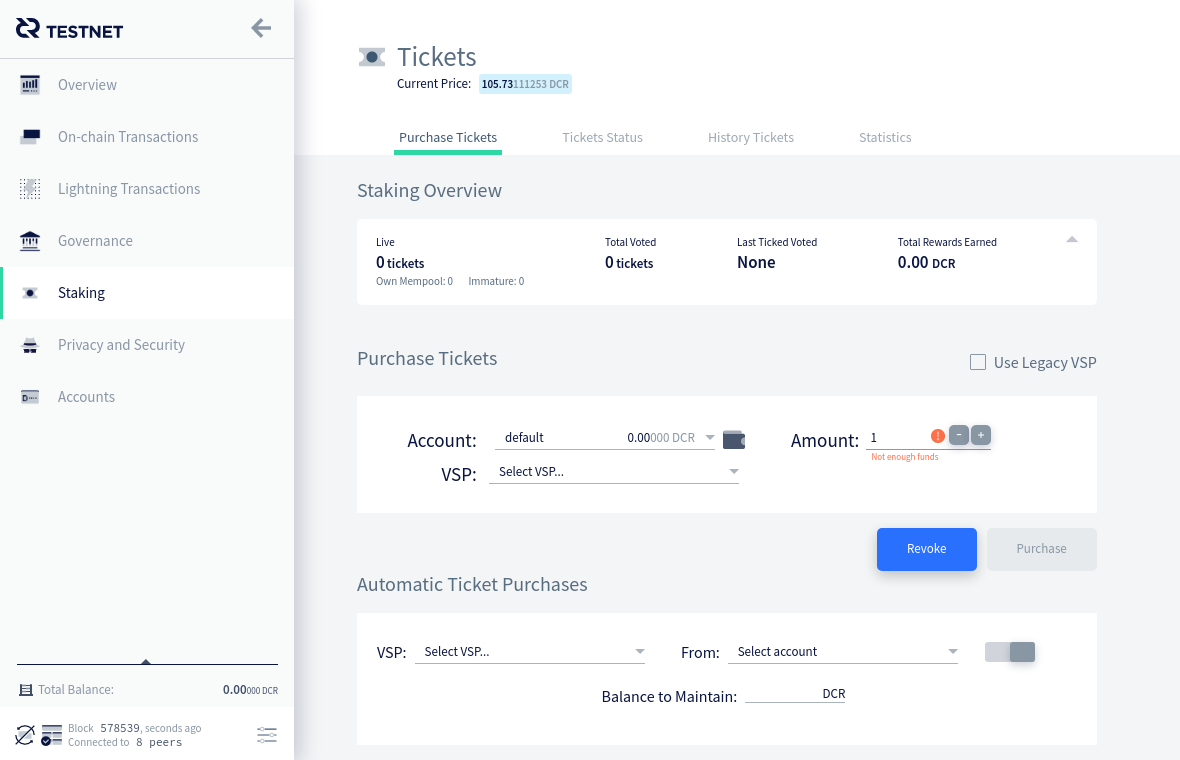
The total number of tickets you currently own is at the top of the page:
- Mempool Tickets - Tickets waiting to be mined by PoW miners (only 20 new tickets are mined into each block)
- Immature Tickets - Mined tickets which cannot vote until a 256 block maturing period has passed (around 20 hours)
- Live Tickets - Mature tickets eligible to be called to vote
Purchasing tickets
In order to purchase tickets you just need to select which account to purchase tickets from, how many tickets you want to buy, select a VSP to use, and then press the Purchase button.
The “Automatic Ticket Buyer” panel allows you to enable the automated ticket buyer - Decrediton will continually buy tickets for you for as long as you keep it running. You can configure how the ticket buyer works using the options:

- VSP - Which VSP to purchase tickets with
- From - Funds to purchase tickets will come from this account
- Balance to maintain - If your balance is lower than this number, you will not buy tickets. The default of 0 will use all the funds in your account to buy tickets
Tickets Status
This tab shows a summary of all of your immature and live tickets. Filters and sorting options are available to make browsing the list easier.
Historic Tickets
This tab shows a summary of all of your tickets which voted, expired or were missed. Filters and sorting options are available to make browsing the list easier.
Statistics
This page displays various statistics about all of the available VSPs. The dropdown can be used to change the currently displayed VSP.

Privacy and Security
The Security Center tab offers two key features - the ability to sign and verify messages using your private key, and the ability to validate addresses.
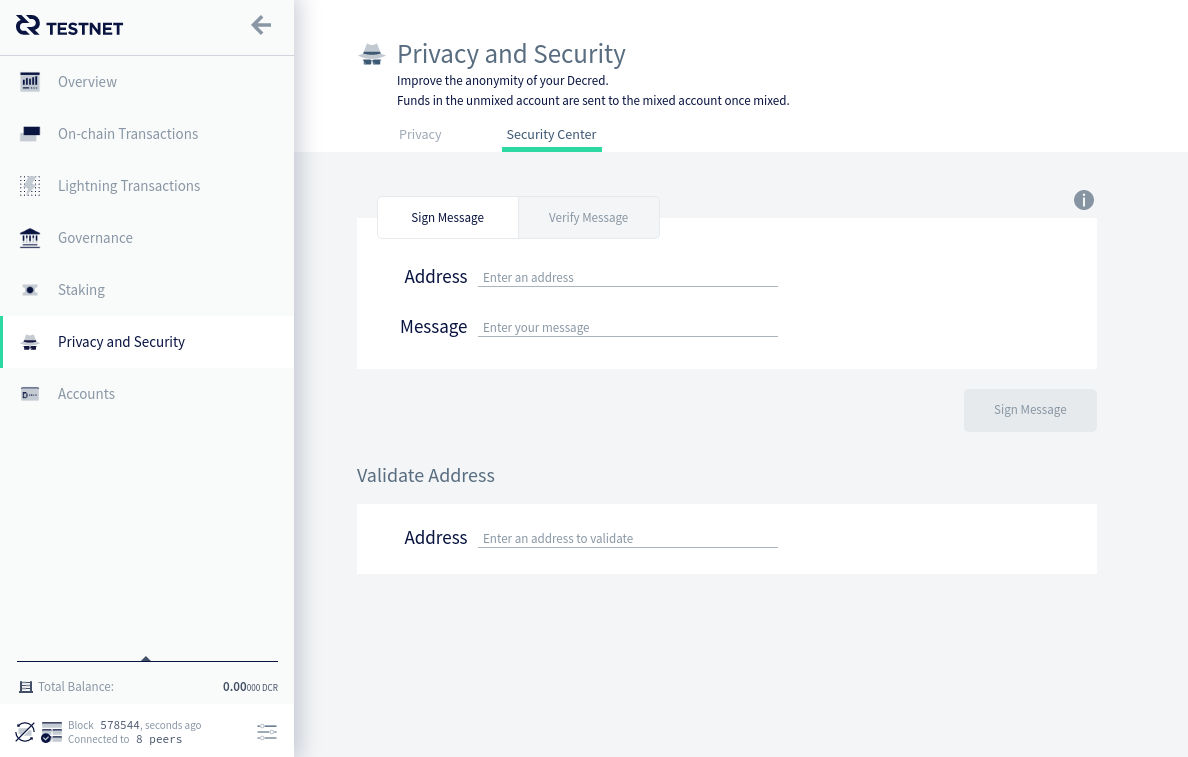
Sign and Verify messages
Signing a message with an address’ private key allows you to prove that you are the owner of a given address to a possible counterparty.
For instance, let’s say you sent 100 DCR to a merchant and you have yet to receive your merchandise. You contact the merchant and explain the situation, but need a way to prove you are, in fact, the owner of the address that the funds were sent from. To do this you can generate a signature based on a message only known to you and your counterparty and the private key associated with the address. Upon receipt, the counterparty may use the Verify Message form to ensure the signature is valid.
Validate Addresses
A Decred address can be entered into the Validate Address text box, and Decrediton will put that address into one of three categories:
- Invalid address
- Valid address owned by the current wallet
- Valid address not owned by the current wallet
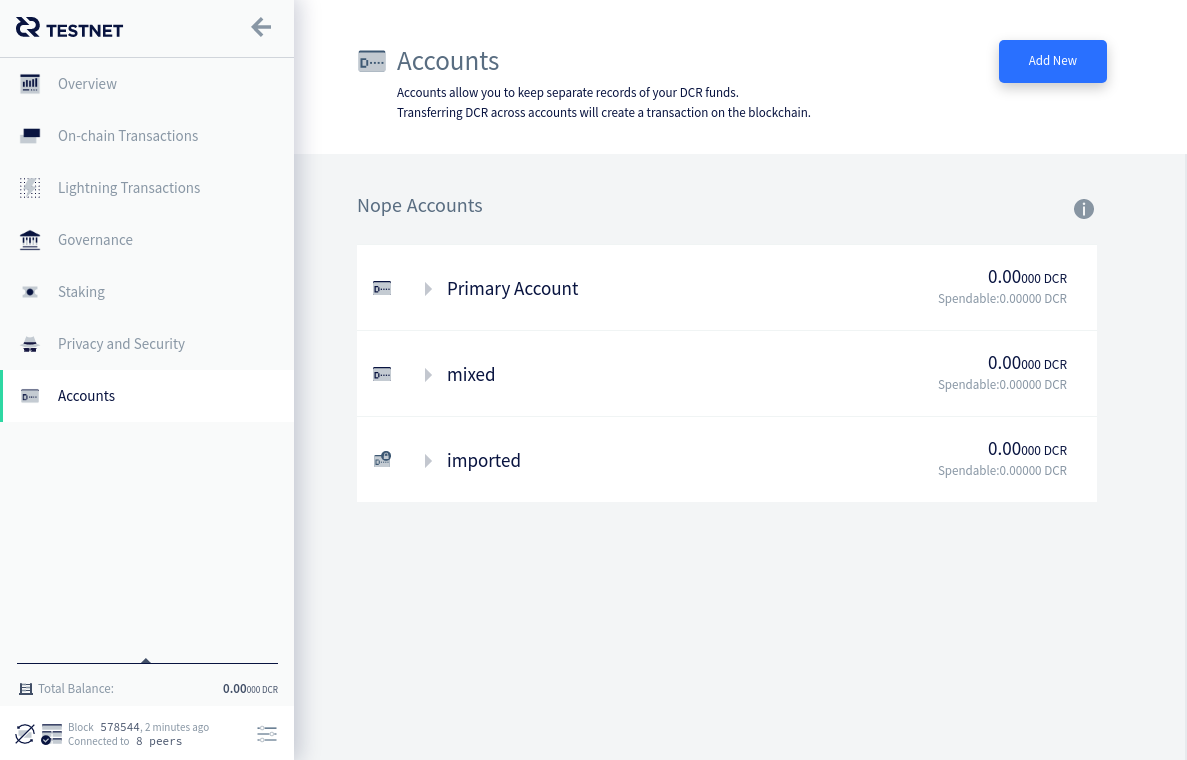
Accounts
The accounts tab shows you the accounts in your wallet and allows you to add new ones. Accounts in Decred work just like bank accounts. They allow you to keep separate records of your DCR. This feature is most useful for those who run businesses and wish to keep separate accounts for tax records for example. Transferring DCR across accounts will create a transaction on the blockchain.
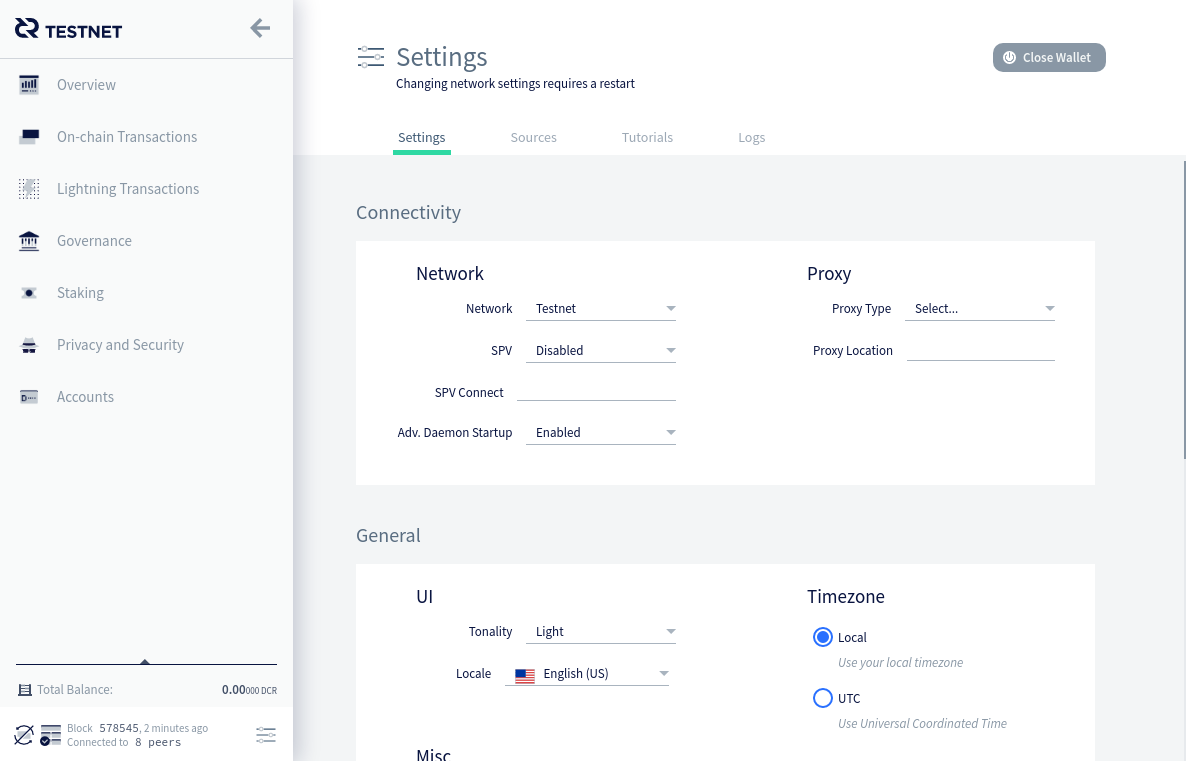
Settings
The settings tab allows you to customize the units DCR amounts are displayed in and also allows you to switch Decrediton onto the testnet blockchain.
The settings tab is also where you come to change your private passphrase.